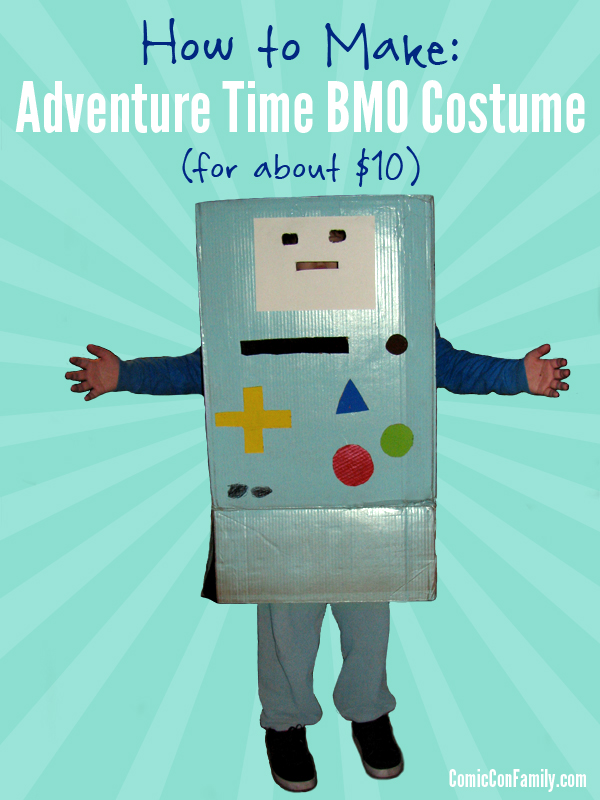
In less than a day, and for about $10, you can make an Adventure Time BMO costume for Halloween or for cosplay.
Of all the Halloween costumes the kids have been (many homemade and cheap) this got the biggest response from people while trick-or-treating. Of course, some people didn’t know who he was, but those that watched Adventure Time knew he was BMO (beemo? I’ve seen it spelled both ways) and they loved the costume. We were stopped constantly and people would walk by and say “cool costume!” — Mattie loved the attention.
Now, our BMO costume is far from perfect. We threw in together in about a day and it was a family project. Both David, myself and Mattie was very hands-on with making it (Mattie drew the back & the front “controller” area). If you spend more time on making yours, you could probably be able to make it look much neater and more perfect. But even still, we were happy with it.
We estimate the cost to be between $10-$15 — this of course depends on how much you have on hand. For us, the cardboard was free, we had tape on hand, plus we had a piece of printer paper, cheap craft paints, glue sticks and paint brushes. We only had to buy the spray paint — even the pants are spray painted because we didn’t have aqua colored pants and couldn’t find any.
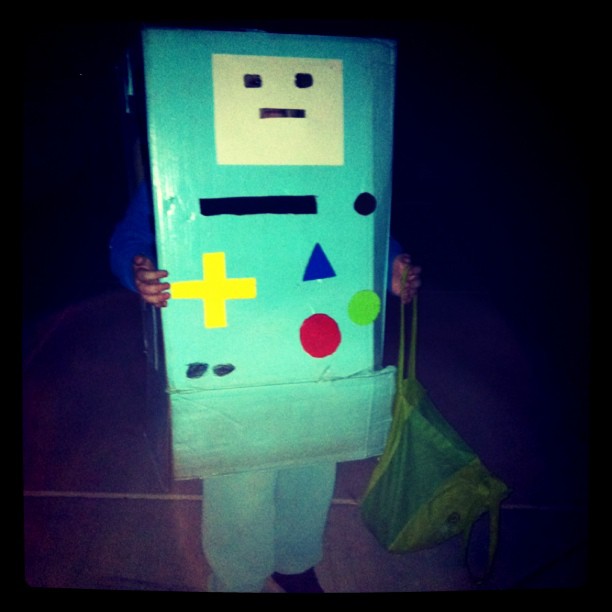
Here’s an Instragram photo while we were out trick or treating on Halloween night 2011.

I wish I had taken more step-by-step photos for making Mattie’s Adventure Time BMO Costume, but I didn’t, as I didn’t even consider posting how to make it, but we got questions about it, so here it goes:
Supplies Needed:
- 1 cardboard box – big enough to fit person’s body, including their head
- Extra piece of cardboard to cut out BMO controls
- Aqua/Teal Spray Paint (we used about 3 cans, but it can vary on how big box is, etc I believe we used Krylon’s Blue Ocean Breeze color)
- Craft Paints in red, blue, green, yellow, black (we use small bottles available at Michael’s craft store for $1 or less)
- Paintbrushes (we used cheapy foam paintbrushes)
- 8.5×11″ white cardstock (could use regular copy paper if you prefer)
- Aqua colored pants (see notes below if you can’t find them)
- Utility Knife
- Scissors
- Hot Glue Gun and Glue Sticks
- Packaging or Masking Tape
1. We started with a cardboard box that was big enough (but not too big) to fit over his body, including his head. The top end was taped closed both from the inside and the outside, but the bottom end of the box was left open.
2. We figured out approximately where our son would need arm holes on the side of the box and cut out one side with the utility knife. Ideally, you want to make round arm holes, with enough uncut space above the holes because the letters “BMO” are painted on the sides of the box from top to bottom, with the arms emerging from the letter “O” (so the letter “O” is the arm hole). It’s difficult to do though, so we didn’t line up the word BMO with the arms — we put the arm holes where we needed them and painted BMO on the side ignoring the holes. TIP: Start your arm hole a bit smaller than you think you need because you can always cut the hole larger. We cut one hole and had our son get inside to see if that one side was right, before we cut the other side.
3. Our son got into the box and with his help, we figured where the eye holes should go and the mouth. This was done with the exact science of him tapping from the inside of the box and me taking a pen and marking where he was tapping. With him OUT of the box, I used the utility knife to cut two round eyes and one long skinny horizontal rectangle for the mouth.
4. Working outside in a well-ventilated area (with no wind), we laid down a bunch of newspaper to protect the ground. We laid the box on top of the newspaper and began spray painting the box. We started with one light layer on the top and sides. Once that was fully dried, we would turn the box to show another area that wasn’t sprayed and we would spray that spot. We continued adding layers of spray paint, letting it dry in between each layer, until the box was fully covered.
5. With the extra piece of cardboard, we drew and cut out BMO’s buttons. A circle, two smaller circles, a triangle, the D-pad (yellow “plus” sign), a long skinny horizontal rectangle, and two smaller horizontal rectangles (I actually forgot these and Mattie drew them on with a Sharpie). Look at BMO and you will see what shapes we cut. Then, the shapes were painted with paint and allowed to dry. These shapes were hot glued to the front of BMO.
6. A white piece of cardstock was glued to the BMO face area to make his “screen”. We glued it on and since this covered up the eye holes and the mouth we previously cut, we used scissors to cut away the paper that was covering these openings.
7. On the back of BMO, we painted his battery cover area and punched holes in the side with a screwdriver for his speaker holes.
TIP: If you can’t find aqua/teal pants or don’t want to spend the money on the ones you do find, you can do what we did…we bought a cheap pair of sweatpants and spray painted them. Yep… spray painted the fabric. We just put pieces of cardboard inside the pants, laid the pants outside on our patio that was covered well with newspaper and with even layers, we painted them, allowing the pants to dry in between each layer. If you are doing this, you might need more spray paint, but we sprayed the pants in the same color we sprayed painted the box.
So that’s how we made our son’s Adventure Time BMO/Beemo Costume!


Very cute costume! My daughter wants to be BMO for Halloween and I was struggling with finding aqua sweats 🙂